 AI项目博客
现在我们将节点连接成一个可工作的图。由于我们的节点处理自己的路由决策,我们只需要一些基本的边。
要启用人工介入(human-in-the-loop)功能,我们需要使用 checkpointer 编译以在运行之间保存状态:
import com.alibaba.cloud.ai.graph.StateGraph;
import com.alibaba.cloud.ai.graph.CompiledGraph;
import com.alibaba.cloud.ai.graph.checkpoint.config.SaverConfig;
import com.alibaba.cloud.ai.graph.checkpoint.savers.MemorySaver;
import com.alibaba.cloud.ai.graph.CompileConfig;
import com.alibaba.cloud.ai.graph.exception.GraphStateException;
import org.springframework.ai.chat.model.ChatModel;
import org.springframework.ai.chat.client.ChatClient;
import static com.alibaba.cloud.ai.graph.StateGraph.END;
import static com.alibaba.cloud.ai.graph.StateGraph.START;
import static com.alibaba.cloud.ai.graph.action.AsyncEdgeAction.edge_async;
import static com.alibaba.cloud.ai.graph.action.AsyncNodeAction.node_async;
import java.util.Map;

/**
* 创建邮件处理 Graph
*/
public static CompiledGraph createEmailAgentGraph(ChatModel chatModel) throws GraphStateException {
  // 配置 ChatClient
  ChatClient.Builder chatClientBuilder = ChatClient.builder(chatModel);

  // 创建节点
  var readEmail = node_async(new ReadEmailNode());
  var classifyIntent = node_async(new ClassifyIntentNode(chatClientBuilder));
  var searchDocumentation = node_async(new SearchDocumentationNode());
  var bugTracking = node_async(new BugTrackingNode());
  var draftResponse = node_async(new DraftResponseNode(chatClientBuilder));
  var humanReview = node_async(new HumanReviewNode());
  var sendReply = node_async(new SendReplyNode());

  // 创建图
  StateGraph workflow = new StateGraph(createKeyStrategyFactory())
          .addNode("read_email", readEmail)
          .addNode("classify_intent", classifyIntent)
          .addNode("search_documentation", searchDocumentation)
          .addNode("bug_tracking", bugTracking)
          .addNode("draft_response", draftResponse)
          .addNode("human_review", humanReview)
          .addNode("send_reply", sendReply);

  // 添加基本边
  workflow.addEdge(START, "read_email");
  workflow.addEdge("read_email", "classify_intent");
  workflow.addEdge("send_reply", END);

  // 添加条件边(基于节点返回的 next_node)
  workflow.addConditionalEdges("classify_intent",
          edge_async(state -> {
              return (String) state.value("next_node").orElse("draft_response");
          }),
          Map.of(
                  "search_documentation", "search_documentation",
                  "bug_tracking", "bug_tracking",
                  "human_review", "human_review",
                  "draft_response", "draft_response"
          ));

  workflow.addConditionalEdges("draft_response",
          edge_async(state -> {
              return (String) state.value("next_node").orElse("send_reply");
          }),
          Map.of(
                  "human_review", "human_review",
                  "send_reply", "send_reply"
          ));

  workflow.addConditionalEdges("human_review",
          edge_async(state -> {
              return (String) state.value("next_node").orElse("send_reply");
          }),
          Map.of(
                  "send_reply", "send_reply"
          ));

  workflow.addEdge("search_documentation", "draft_response");
  workflow.addEdge("bug_tracking", "draft_response");

  // 配置持久化
  var memory = new MemorySaver();
  var compileConfig = CompileConfig.builder()
          .saverConfig(SaverConfig.builder()
                  .register(memory)
                  .build())
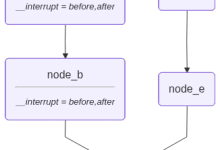
          .interruptBefore("human_review")  // 在人工审核前中断
          .build();

  return workflow.compile(compileConfig);
}
图结构是最小的,因为路由通过节点内部的返回值发生。每个节点通过返回 next_node 键来声明它可以去哪里,使流程显式和可追溯。
测试您的代理
让我们用一个需要人工审核的紧急账单问题来运行我们的代理:
import com.alibaba.cloud.ai.graph.CompiledGraph;
import com.alibaba.cloud.ai.graph.RunnableConfig;
import com.alibaba.cloud.ai.graph.NodeOutput;
import reactor.core.publisher.Flux;
import java.util.ArrayList;
import java.util.Map;

/**
* 测试紧急账单问题
*/
public static void testBillingIssue(CompiledGraph app) throws Exception {
  log.info("=== 测试紧急账单问题 ===");

  // 测试紧急账单问题
  Map<String, Object> initialState = Map.of(
          "email_content", "我的订阅被收费两次了!这很紧急!",
          "sender_email", "customer@example.com",
          "email_id", "email_123",
          "messages", new ArrayList<String>()
  );

  // 使用 thread_id 运行以实现持久化
  var config = RunnableConfig.builder()
          .threadId("customer_123")
          .build();

  // 使用 stream 执行,直到中断点(human_review)
  // 图将在 human_review 处暂停(因为配置了 interruptBefore)
  Flux<NodeOutput> stream = app.stream(initialState, config);
  stream
          .doOnNext(output -> log.info("节点输出: {}", output))
          .doOnError(error -> log.error("执行错误: {}", error.getMessage()))
          .doOnComplete(() -> log.info("流完成"))
          .blockLast();

  // 获取当前状态,检查是否有草稿回复
  var currentState = app.getState(config);
  Map<String, Object> stateData = currentState.state().data();
  String draftResponse = (String) stateData.get("draft_response");
  if (draftResponse != null) {
      log.info("Draft ready for review: {}...",
              draftResponse.length() > 100
                      ? draftResponse.substring(0, 100)
                      : draftResponse);
  }

  // 准备好后,提供人工输入以恢复
  // 使用 updateState 更新状态(interruptBefore 模式下,传入 null 作为节点 ID)
  var updatedConfig = app.updateState(config, Map.of(
          "approved", true,
          "edited_response", "我们对重复收费深表歉意。我已经立即启动了退款..."
  ), null);

  // 继续执行(input 为 null,使用之前的状态)
  app.stream(null, updatedConfig)
          .doOnNext(output -> log.info("节点输出: {}", output))
          .doOnError(error -> log.error("执行错误: {}", error.getMessage()))
          .doOnComplete(() -> log.info("流完成"))
          .blockLast();

  // 获取最终状态
  var finalState = app.getState(updatedConfig);
  String status = (String) finalState.state().data().get("status");
  log.info("Email sent successfully! Status: {}", status);
}
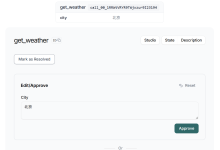
图在遇到 interruptBefore 时暂停,将所有内容保存到 checkpointer,然后等待。它可以在几天后恢复,准确地从它停止的地方继续。thread_id 确保这个对话的所有状态都保存在一起。
注意:在 interruptBefore 模式下,使用 app.stream() 方法执行图,它会流式返回每个节点的输出。当执行到配置的中断点(human_review)时,图会自动暂停。使用 app.getState() 可以获取当前状态,使用 app.updateState() 可以更新状态并提供人工输入,然后再次调用 app.stream() 继续执行。
本文整理自 Spring AI Alibaba 官方文档《Graph 工作流编排指南》:https://java2ai.com/docs/frameworks/graph-core/quick-start